If you’ve ever scrolled through a food Instagram feed, you’ve paused mid-scroll over a perfectly styled fruit platter: the kind where a single strawberry glows like a tiny ruby, kiwi slices fan out like hand-painted watercolor petals, and every element feels intentional, not just dumped on a platter. As someone who’s spent the last 7 years building my small, custom fruit platter business (no fancy corporate name, just me, a team of part-time fruit stylists, and a whole lot of crumpled plastic wrap), I’ll let you in on a secret: the best photo-worthy fruit platters aren’t about fancy tools or expensive produce. They’re about balancing three things—your client’s vision, scientific fruit science, and the kind of small, specific choices that turn a good shot into a viral one. Today, I’m breaking down exactly how to pull this off, whether you’re a small business owner, a blogger, or a brand hiring a stylist for a campaign. Customized Fruit Platter
Let me start with why fruit is such a tricky (and rewarding) subject for photos. Unlike a cake or a chocolate bar, fruit is organic. It bruises, wilts, and oxidizes faster than you can press a shutter button. I’ve had a client tear up once because we spent 2 hours styling a platter for a product launch, and by the time the photographer arrived, half the blueberries had turned dull and shriveled. That’s the mistake most people make: they treat fruit for photo shoots like regular fruit for a party platter. Big difference. A party platter needs to look good for 2 hours; a photo shoot platter needs to look perfect for 15 minutes (max—trust me, I’ve tested this). So the first step isn’t even about arranging fruit—it’s about choosing the right fruit, at the right ripeness, and prepping it so it doesn’t betray you mid-shot.
Let’s get specific on fruit selection, because this is where the science comes in. First, ripeness is non-negotiable. For a photo shoot, you want fruit that’s “dead ripe” in the best way—firm, not mushy, full of color, but not so ripe it’s about to turn. Let’s break down common fruits:
- Strawberries: For red varieties like Albion or Chandler, pick ones where the flesh is deep, vibrant red all the way up to the green leafy top (called the calyx). If the white “shoulder” near the calyx is more than half an inch, it’s unripe; if the skin is soft when you squeeze gently, it’s overripe and will bruise in 10 minutes. I always test 10-15 strawberries for a shoot, then refrigerate them in a single layer on a paper towel-lined tray until I’m ready to style. The paper towel absorbs excess moisture, which is key for preventing sogginess.
- Kiwis: Gold kiwis have a brighter, more uniform yellow color that pops on camera better than green, but they need to be just ripe enough to slice—firm, not rock-hard. If you let them sit too long after slicing, the edges will turn brown within 20 minutes. Pro tip: Peel kiwis with a small paring knife, not a vegetable peeler, for clean, even slices that don’t tear.
- Blueberries: This is the fruit that hates photo shoots most. Their thin skin oxidizes fast, and they get shriveled if they’re not fresh. Only use blueberries that are plump, shiny, and have a faint white waxy bloom (that natural protective coating) on them—avoid any that look dull or have wrinkles. I actually keep a small bowl of cold water and a paper towel handy during shoots: if a blueberry starts to dull, dip it in cold water for 2 seconds and pat it dry, and the bloom will come back for a quick pick.
- Citrus: Lemons, limes, and oranges are workhorses for fruit platters, because their bright color is unbeatable on camera. But for slices, don’t cut them until the last minute. If you have to pre-slice, toss them in a bowl of cold water with a teaspoon of lemon juice to prevent browning. For whole citrus, choose ones with smooth, taut skin—bumpy skin looks messy and doesn’t photograph as well.
Now, the custom part. This is my favorite part of my job, because most clients come to me with a specific vision, not a generic “fruit platter.” A local coffee shop might want a platter that matches their brand’s terracotta and sage color palette for their summer ad campaign. A wedding planner might need a platter that complements a pastel pink and blue table setting for a bridal shoot. A skincare brand might want a platter focused on mango and papaya to highlight their exfoliating products. The key here is to translate that vision into something that’s visually balanced, and also works for photography. For example, if a client’s brand is minimalist, don’t overcrowd the platter—negative space is just as important as the fruit itself. If they want a bohemian, foraged look, mix small bowls of berries with whole figs and a few sprigs of fresh mint for texture, but don’t add so many elements that it looks cluttered.
Wait, let’s talk about props and texture, because that’s what elevates a fruit platter from a product shot to a mood piece. A lot of new stylists will load up a platter with every fruit they can find, but texture is what makes the photo pop. Think about contrasting textures: a crisp, juicy apple slice next to a soft, velvety peach half, a shiny, smooth grape next to a rough, fuzzy kiwi skin, a matte green fig next to a glossy red strawberry. I always have a stash of extra props that fit different styles: wooden cheese boards for rustic shoots, white ceramic platters for minimalist, terracotta bowls for warm, earthy campaigns, even linen napkins or small terracotta pots for holding extra fruit sprigs. The most important rule for props: they should support the fruit, not compete with it. If your fruit is bright red and yellow, don’t use a bright orange platter—your eye will go to the platter, not the fruit. Neutral, warm tones (wood, cream, terracotta, matte black) work 9 times out of 10, and if a client wants a pop of color, add that in small elements like linen napkins or a single vase of flowers, not the main platter base.
Now, the styling step-by-step, which is the part I walk through with my team every time we take on a new shoot. I used to work with a big marketing agency that would drop off a brief the night before a shoot, and we’d have to pull it off at 7 a.m. in a studio with harsh overhead lights, so I’ve refined this process over hundreds of shoots.
- Prep 1 hour before shoot time: Lay out all your fruit on separate paper towel-lined trays, already washed and prepped (sliced, pitted, calyxes removed from strawberries, etc.). Label each tray so you don’t mix them up: “strawberries, whole” “kiwi slices” “blueberries” “fig halves” etc. This saves so much time on shoot day, when you’re rushing to beat the clock.
- Set up your base: Don’t plop fruit directly on a board or platter without a foundation. For most shoots, I add a thin layer of greenery or edible foliage (mint, basil, borage leaves, even small pansy flowers for color) as a base. It fills in empty spaces, adds a fresh green backdrop that makes fruit colors pop, and hides any messy edges or crumbs. For a more high-end, minimalist look, you can use a thin layer of yogurt or honey (edible, so it works if the platter is for a brand that’s filming a recipe video too) to keep fruit from sliding.
- Build in layers, not rows: The number one mistake people make is arranging fruit in neat, even rows. That looks like a grocery store display, not a photo shoot. Instead, build layers: start with larger, bolder fruit (figs, peach halves, whole apples) as focal points, then add medium-sized fruit (kiwi slices, whole pears) around them, then fill in gaps with small fruit (blueberries, raspberries, grapes). Stand back every few minutes and check from 10 feet away—does it look balanced? Does the eye move easily from one element to the next?
- Add “action” to the platter: This is the secret sauce to making a fruit platter photo feel alive, not static. Instead of all strawberries standing upright, prop a few at a slight angle. Tuck a few blueberries between fig halves, or let a handful of grapes spill over the edge of a small bowl. For a more dynamic shot, you can even have a stylist’s hand (or a model’s hand, if it’s a lifestyle shoot) reaching for a fruit—this adds movement that makes the photo engaging. I once did a shoot for a fitness brand where we styled a platter for a post-workout snack, and we added a glass of cold water with a lemon slice next to it, plus a pair of running shoes in the background—small touches that tell a story, not just show fruit.
- Touch up right before the photographer arrives: Even if you prep perfectly, fruit will start to fade or wilt if it’s sitting out for more than an hour. Keep a small kit on hand: a spray bottle of cold water (spritz fruit gently to make it look shiny, like it just came off the tree), a small paring knife for trimming brown edges, a paper towel to dab off excess moisture, and a pair of tweezers for plucking any stray pieces of greenery or a single wilted blueberry that snuck in. I once had a shoot where the photographer was running 20 minutes late, so we kept the platter covered with a loose plastic wrap (not tight, which would squash fruit) in the fridge, and touched it up 5 minutes before he got there—saved us a disaster.
Now, a quick note on practicality, because I know a lot of people reading this are not just styling platters for fun—they might be ordering a custom platter for a real event where the photos will be seen by hundreds or thousands of people. I always tell clients to balance photo-worthiness with taste, because a platter that looks amazing but is bland or overripe is useless. For example, if you’re doing a shoot for a grocery store that’s launching a line of fresh fruit, we’ll use 90% ripe fruit that tastes good, and only a small amount of extra-firm fruit for stylistic touches. And if the platter is going to be served after the shoot, we tell the client to add any sliced fruit right before serving, instead of letting it sit out all day.
Over the years, I’ve learned that the best custom fruit platters for photo shoots aren’t about following a trend—they’re about listening to what the client actually needs. Last year, a small baby food brand reached out to me for a launch shoot. Their vision was warm, soft, and focused on “real, homegrown fruit” for their organic baby purees. I didn’t use any fancy props or neon colors—just a simple wooden board, whole peaches, sliced pears, and a few mint leaves. We styled it so some fruit was slightly cut, like a mom would prep for her kid, not a stylist. That photo ended up on their packaging, and they told me it drove 30% of their first month of sales. That’s the impact a well-styled fruit platter can have.

If you’re looking to order a custom fruit platter for your next photo shoot, whether it’s for social media, a product campaign, a wedding, or a blog post, the first step is to share your vision with the supplier. Tell them the mood you’re going for (minimalist, bohemian, bright and bold, warm and earthy), the colors that matter, and if the platter will be served after the shoot. A good custom supplier will ask you questions too: how long is the shoot, what’s your budget, do you have any dietary restrictions? They’ll also adjust the fruit prep to make sure the platter stays fresh through the entire process.
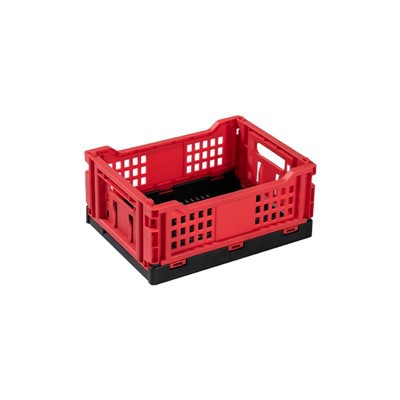
Foldable Storage Box References:
- Plant Physiology, 5th Edition, by Lincoln Taiz and Eduardo Zeiger (for information on fruit ripening and oxidation processes)
- The Food Stylist’s Handbook, by Jenny Harrington (guidelines for food arrangement and visual balance for photography)
- Journal of Food Science, Vol. 78, No. 10, 2013 (studies on fruit shelf life and appearance preservation for photographic use)
Hangzhou Cheerhope New Materials Co., Ltd.
As one of the most professional customized fruit platter manufacturers and suppliers in China, we offer a wide range of products with superior quality. Please rest assured to wholesale bulk durable customized fruit platter made in China here from our factory. Contact us for more discount information.
Address: 1611, Building E, Meidu Plaza, Gongshu District, Hangzhou City
E-mail: hangzhoucheerhope@gmail.com
WebSite: https://www.chinastoragebox.com/
