If you’ve ever spent hours assembling a new bookshelf or kitchen cabinet, only to step back and notice a gap between the raw particleboard or MDF edge and the plastic or wood veneer banding, you know how frustrating that is. I’ve been in the home furniture edge banding game for over a decade, working directly with cabinet makers, DIYers, and small remodel teams, and one question I get more than any other is: how do I make sure that banding sticks tight, no weird gaps, no peeling a month later? It’s not rocket science, but it’s also not just “cut and stick.” There are a few key moves you can make that I’ve tested thousands of times, and they’re way simpler than you might think. Home Furniture Edge Banding

First off, let’s talk about prep. I can’t stress this enough—bad prep is the #1 reason banding fails, hands down. I’ve seen guys skip this step and wonder why their brand new kitchen edge banding fell off after a week. Let’s start with the surface you’re working with: raw particleboard or MDF, right? Most people just grab their banding, line it up, and go, but that’s a mistake. MDF in particular is super porous, so if there’s dust, sawdust, or even a tiny bit of oil on the edge, the glue won’t stick. Here’s what I actually do (and what I teach all the new guys on my supply team): grab a stiff bristle brush—an old paintbrush works great, even a toothbrush for tight corners—and scrub the entire edge thoroughly. Get all the loose sawdust out of the pores, especially if you just cut the board with a jigsaw or router. Then, take a lint-free cloth, dab a little denatured alcohol (you can get this at any hardware store, way cheaper than fancy wood cleaner), and wipe the edge down. Let it dry for 2 minutes, no rushing here. If you skip this, that dust is like a tiny barrier between the glue and the board—your banding might look good at first, but it’ll pop off when that dust shifts.
Next, cutting the banding to size. This is another part people mess up. A lot of guys just cut it a little longer than the edge, which is fine, but here’s the trick: don’t cut it so long that it’s hanging way over, because that makes trimming harder and can pull the band off. Wait, no—actually, cut it exactly 1/8 inch longer on each end than the edge you’re covering. That tiny extra length lets you press the band into the corner ends without leaving a gap, but it’s not so much that you’re fighting to trim it later. Also, use the right cutting tool. A pair of good quality tin snips works for small edges, but if you’re doing longer cabinet pieces, a banding cutter is worth the $20. It makes a clean, straight cut, no frayed edges. Frayed edges on the banding mean there’s a weak spot where glue can’t bond, and that’s where peeling starts.
Now, the glue. This is where most DIYers go cheap, and it shows. I get so many calls from people who bought that super cheap spray adhesive from the dollar store, and their banding slides around when they press it. Don’t do that. Use hot melt adhesive specifically made for edge banding. Wait, not all hot melt is the same—there’s general purpose, and then there’s the one for porous boards like MDF and particleboard. The stuff we sell is formulated to melt at exactly the right temperature, not too hot that it burns the MDF, not too cool that it doesn’t flow into the pores. Pro tip: if you’re using a hot glue gun, make sure it’s a heavy-duty one, not the tiny craft ones. Those don’t get hot enough for proper bonding. You can also use contact cement, but that’s more for larger, flat edges—hot melt is way easier for beginners, no waiting for it to dry before pressing.
Here’s the part that makes all the difference: applying the glue and pressing the band. Let’s break this down. If you’re using hot melt, run the glue along the entire edge of the board, but don’t slather it on so thick that it drips all over. A thin, even coat is key—too thick and it will squeeze out too much, making a mess; too thin and there’s not enough bond. Then, immediately line up the banding with the edge, pressing it down firmly with your hand as you go. Don’t lay it on and walk away—hold it steady for 10 to 15 seconds along each section. For longer edges, use a J-roller (that’s a small, rubbery roller you can pick up at hardware stores) to roll the band from end to end, applying even pressure. That gets rid of any air bubbles, which is another secret to a tight fit. Air bubbles under the band mean the glue isn’t making full contact, so that spot will come loose. I also always press the ends first. Take that extra 1/8 inch of banding and fold it over the end of the board, pressing it down with your finger or a small clamp (even a clothespin works) for 20 seconds. That stops gaps at the corners, which is where most people notice flaws.
Wait, what about if you’re doing curves? A lot of home cabinets have rounded edges, and that’s where a lot of guys struggle. Straight edges are easy, curves feel tricky, but it’s the same prep—just need to make sure the banding is flexible enough. Use flexible PVC or wood veneer banding, not the rigid plastic stuff. When you apply the glue, make sure it’s a little more even, and when you press, work slowly from one end of the curve to the other, using your fingers to follow the curve, no sharp creases. If you get a crease, that’s a weak point—slow down, adjust the banding as you go, and press extra hard on that spot. I’ve seen guys use a hair dryer on low heat for curves, just to make the banding a little more pliable, but don’t use high heat—you’ll melt the glue or warp the board.
Now, trimming the excess banding. This is the final step that seals the deal, and if you do it wrong, you’ll ruin all the hard work. Don’t use a regular utility knife. Those can scrape the edge of the board or make uneven cuts. Use a banding trimmer—there are two types: one for the top/bottom edges, and one for the side ends. The side trimmer has a small blade that sits right at the edge of the board, so it cuts only the excess banding, not the board. For the top/bottom trim, a small hand-held trimmer works, or even a router with a flush trim bit if you have one, but a trimmer is way simpler. Take your time when trimming—go slow, don’t rush. If you go too fast, the blade will catch and pull the banding away from the board. Also, if you have that extra 1/8 inch on the ends, trim that first, then work your way along the long edges.
I should also mention some common mistakes I see all the time. One is not letting the glue set before moving on. If you’re using hot melt, it will set in about 5 minutes, but if you put the cabinet in a warm room right after, the glue can soften and the band can shift. Wait at least 30 minutes, if not an hour, before handling the piece. Another mistake is storing banding wrong. I see guys leave their banding rolled up in the garage for months, and when they go to use it, it’s got permanent creases, which make it impossible to get a tight fit. Store banding flat, in a cool, dry place, not leaning against a wall or rolled up.
Look, I’m not here to sell you something super complicated. I’ve been doing this for long enough that I know most people don’t have a huge workshop—they’re DIYers working in their garage, small contractors with limited tools. The tips I’ve given are all doable with basic tools you can pick up at any home center. At the end of the day, a tight edge banding isn’t just about looks—it keeps moisture out of the raw board, which prevents warping and extends the life of your furniture. A gap there might seem small, but over time, that’s where mold starts, or the board swells and your door doesn’t close right.
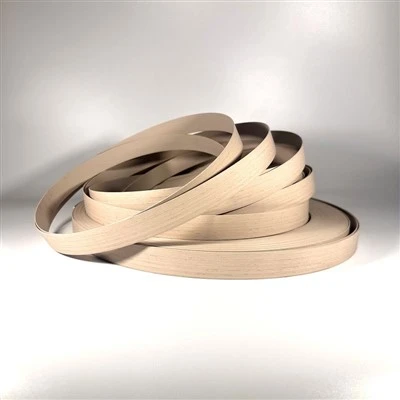
If you’re working on a big project—like an entire kitchen cabinet refresh, or building custom bookshelves—and you need quality edge banding that’s made for home use, we’ve got you. We stock all types: PVC, wood veneer, flexible for curves, even heat-activated adhesive pre-applied so you don’t have to worry about mixing glue. Our team has been helping folks get that tight, professional fit for years, and we can answer any questions you have—whether it’s about cutting tools, glue, or which banding works best for your project. If you’re ready to grab supplies that will actually make your installation go smooth, get in touch to talk through what you need.
Panel Furniture Edge Banding References:
- Woodworking Network. “Edge Banding Best Practices for Residential Furniture.” 2022.
- American Wood Council. “Adhesion and Surface Preparation for Wood Edge Banding.” 2021.
- DIY Network. “Fixing Common Edge Banding Mistakes for Beginners.” 2020.
- Architectural Digest. “How to Choose the Right Edge Banding for Home Remodel Projects.” 2023.
Linyi Meador New Materials Co., Ltd.
As one of the most experienced home furniture edge banding manufacturers and suppliers in China, we offer a wide range of products with superior quality. We warmly welcome you to buy bulk premium home furniture edge banding from our factory. Good service and punctual delivery are available.
Address: Meidu New Materials, No. 66 Zhenxing Road, Tanyi Town, Feixian County, Linyi City, Shandong Province
E-mail: meador@zohomail.cn
WebSite: https://www.meadorfactory.com/
